FreelancerHQ DocumentationCurrent version 1.0
Installation
Server Requirements
Your web hosting need to have the following minimum requirements to run FreelancerHQ:- A LAMP server (Linux/Unix + Apache + MySQL + PHP)
- Apache web server with mod_rewrite enabled
- PHP 5.3 or newer
- PHP PDO extension enabled
- PHP GD extension enabled
- MySQL 5
Installing FreelancerHQ
The following are steps to install the script.Step 1 - Unzip and Upload
Extract and copy the script files to your server. Ensure that all files has been uploaded to your server.
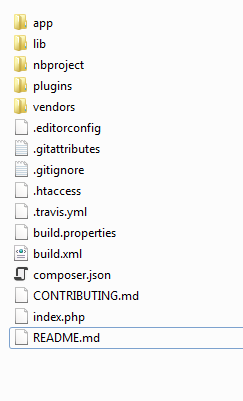
* If you got Page not found while accessing the website, try check whether the .htaccess file is uploaded or not.
Step 2 - Open Installation Wizard
If you have all requirements meet, open web browser and goto the url of your installed script. The system will redirect you to the installation page.
*If the installation page did not show up and your getting some errors on your screen then please check FAQ tab and find your answer there.
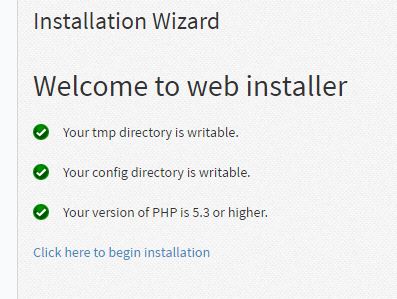
Step 3 - Installation Wizard Steps
- First step checking the requirements
All requirements must be green. If you have red with one of them. Please check your php version on your cpanel (You can find that options on Select Php Version ). If you did not find any configuration about that. Please contact with your web hosting provider.
- Next step, setup the database. Open your MySql database admin or PhpMyAdmin and create a new database for the FreelancerHQ. If necessary, create the user's database and assigned it to the database. Keyin the database info in the database configuration form.
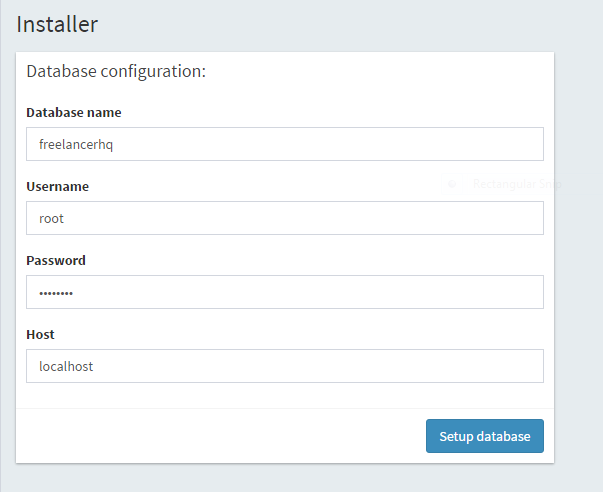
- Click Setup database to install the database
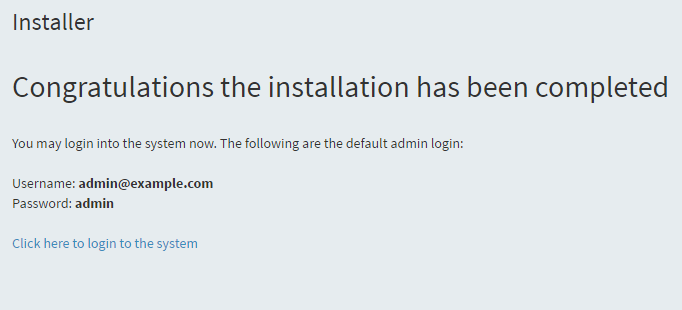
- That is it! All the necessary things automatically created by the wizard. Now you can exit the wizard and follow the introductions to access the system. Don't forget to change your default admin password in the manage users page.
Configuration
When your installation is complete, it’s time to configure FreelancerHQ.
To set the company name, logo etc. Login to the system and click Settings. There are several section in Settings page as per below:
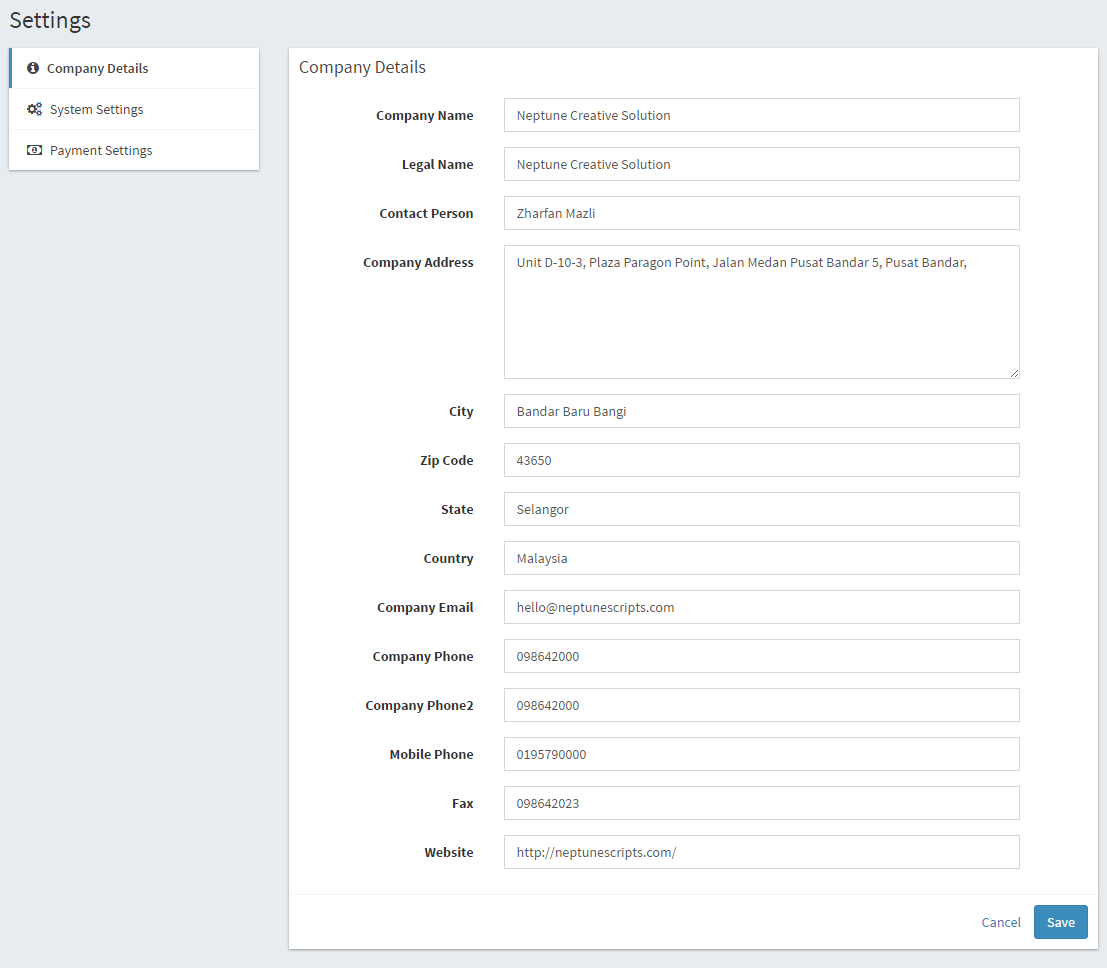
Company Details
This is where you can change your company details such as company name, address, phone etc.
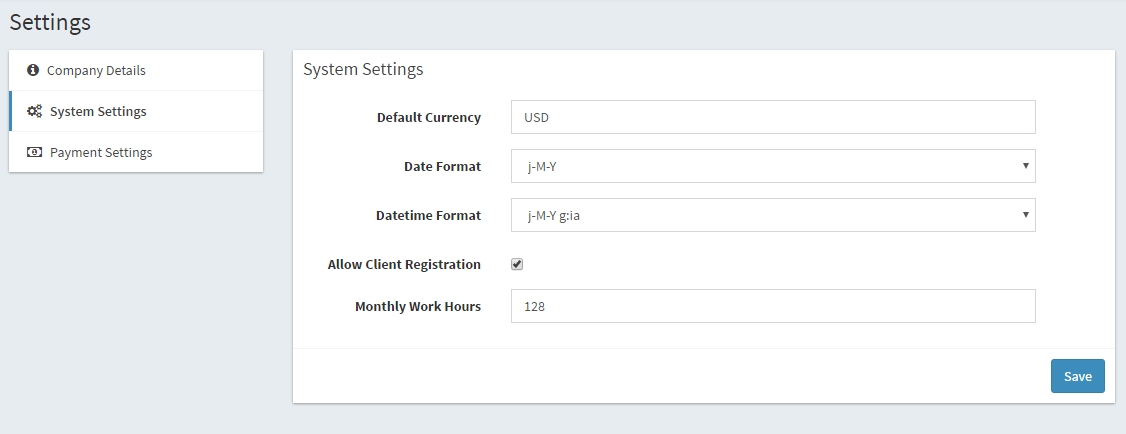
System Settings
This is where you can change the system settings such as currency formating, date formating etc.
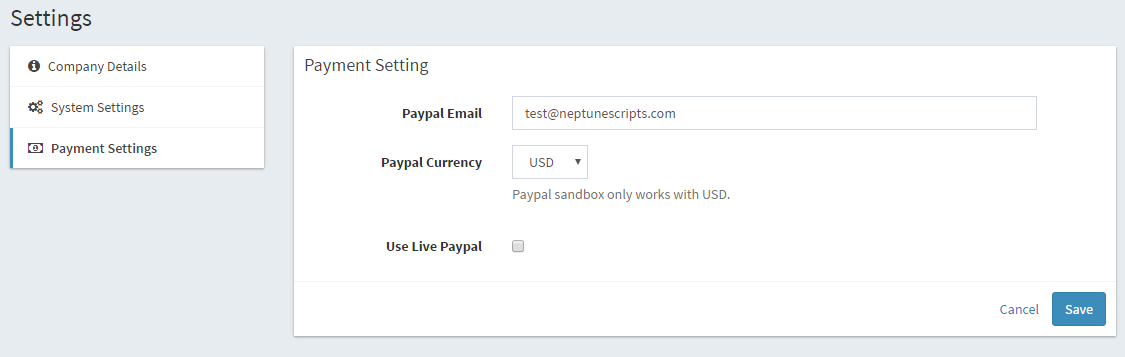
Payment Settings
This is where you can change your payment settings such as paypal email and currency.
User Roles
There are three user roles builtin into the system:
Client
- Can only view his project's listing and details
- Can only submit and view his tickets
- Can post to project's discussion
Team member
- Can only view assigned projects
- Can only view own timesheets
- Full control in managing tickets
Admin
- Full control in managing all modules
- Can manage system settings
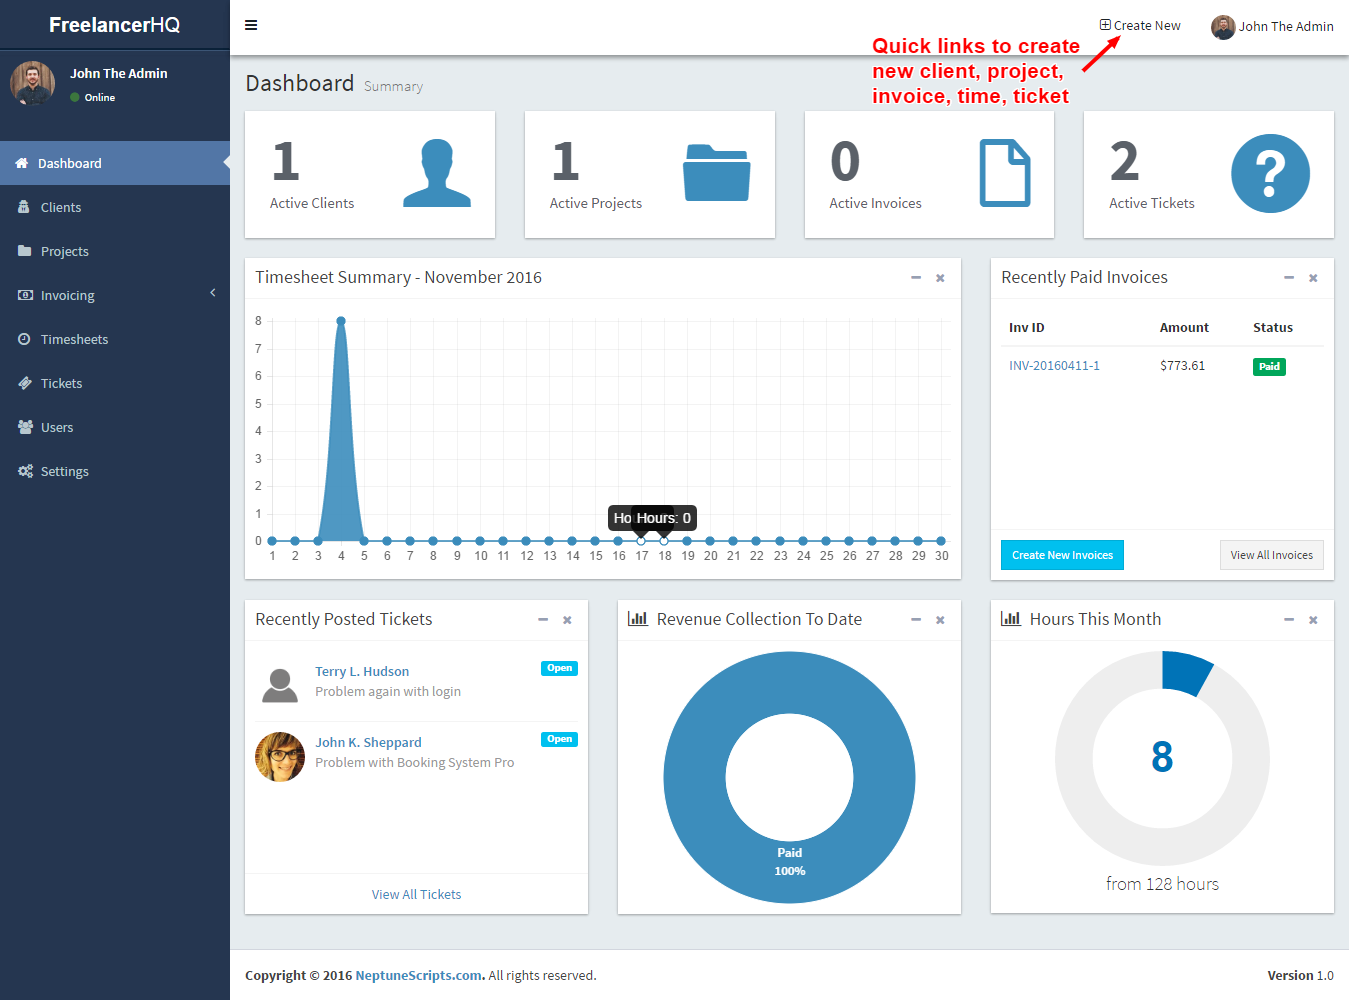
Dashboard
This is where system display various counter and chart for user's overview.
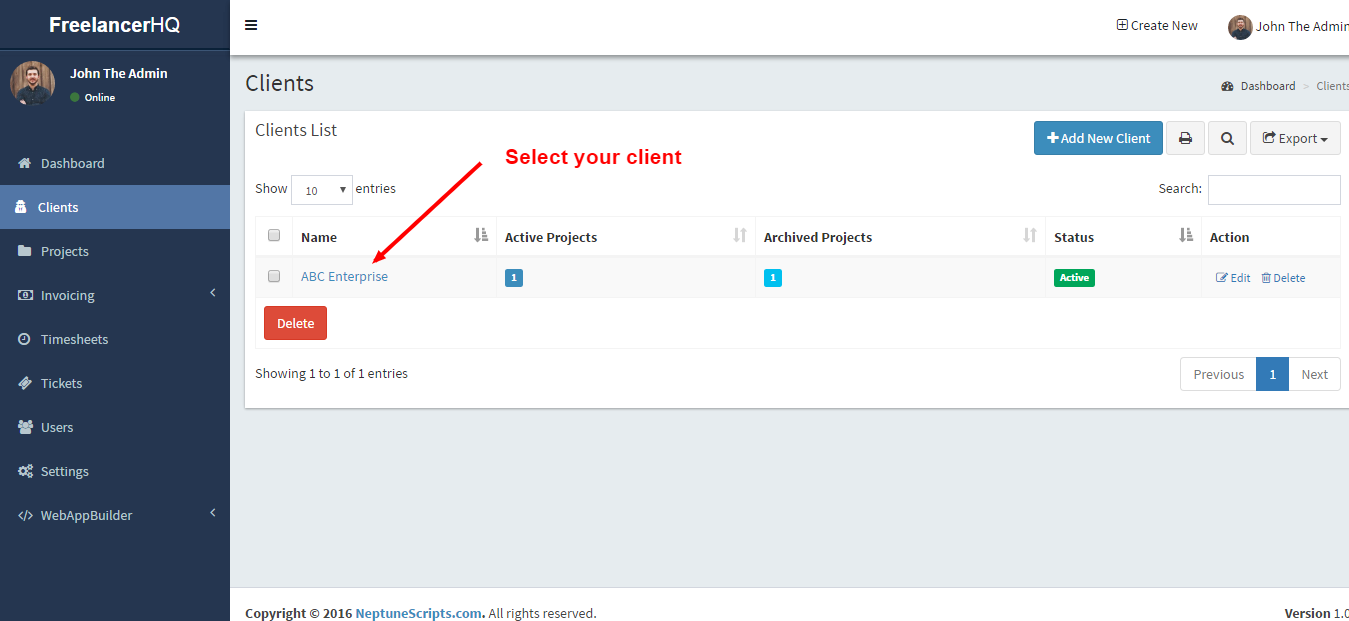
Clients Management
This is where you can manage your clients.
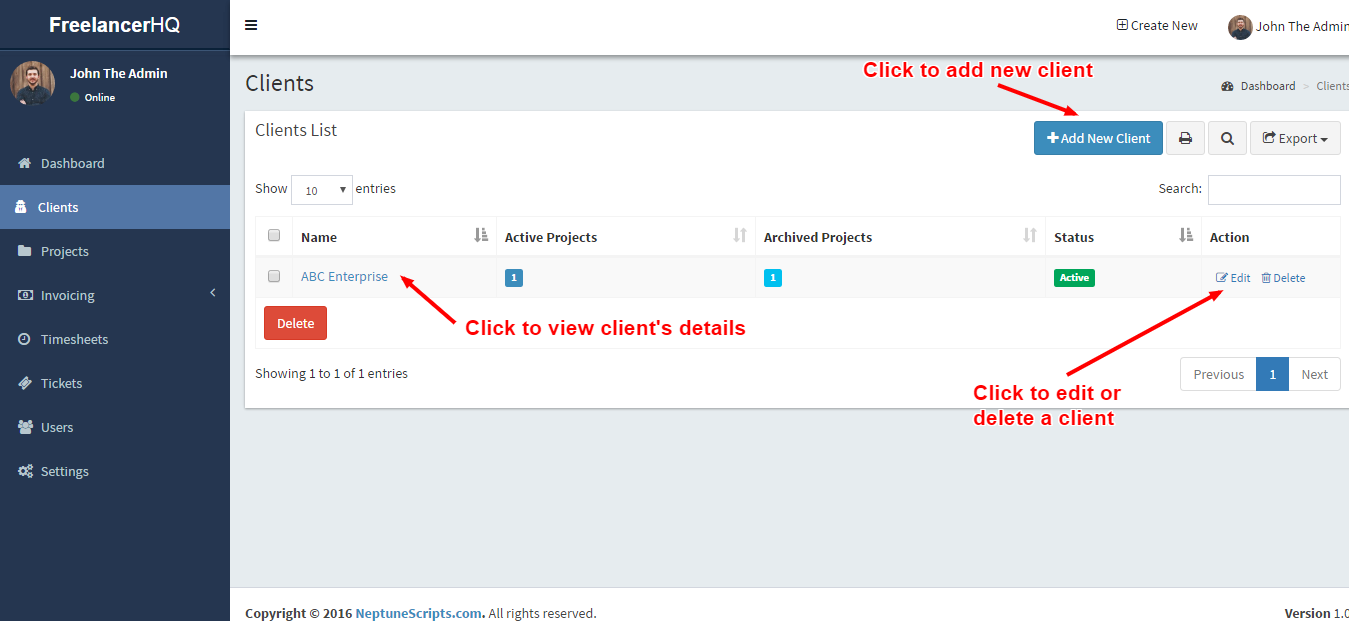
View client's details
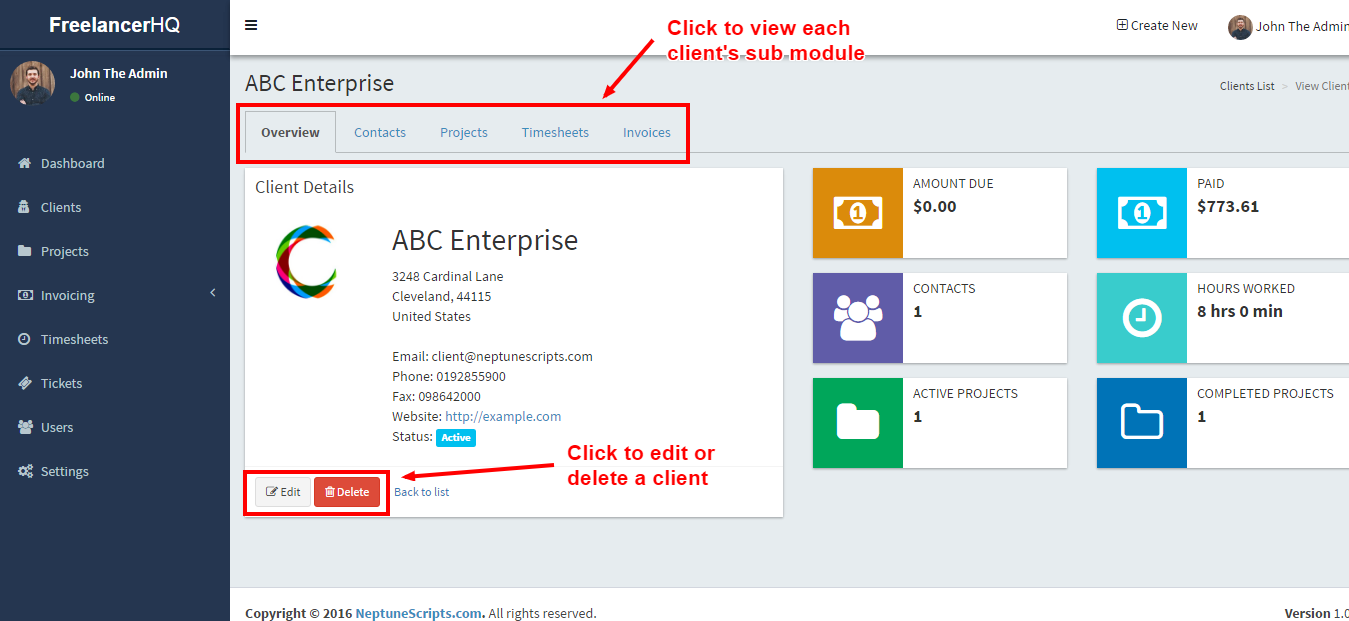
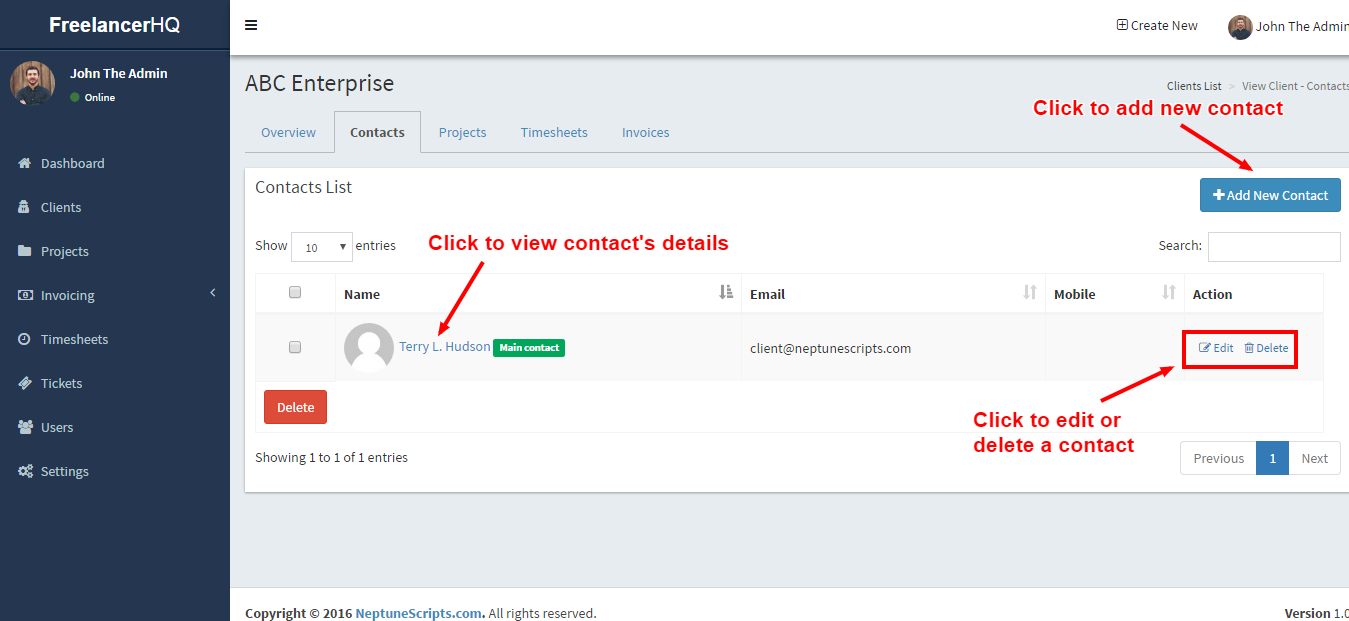
Manage Client's contacts
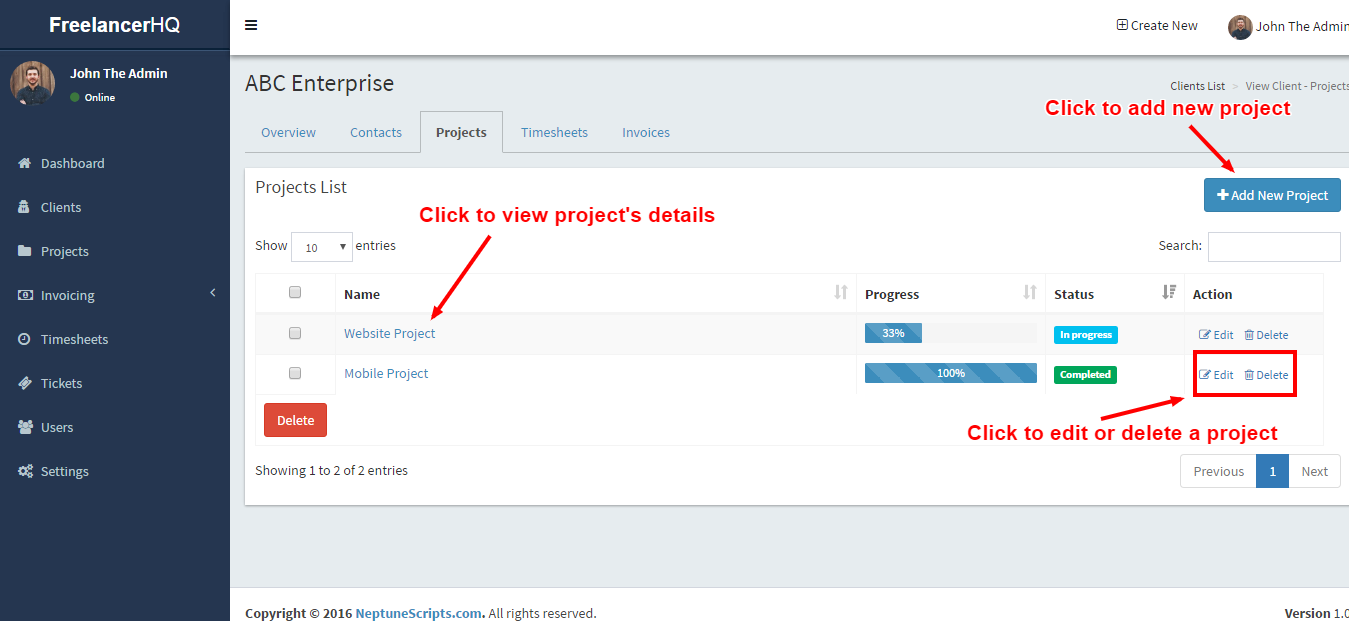
Manage Client's projects
Manage Client's timesheets
Manage Client's invoices
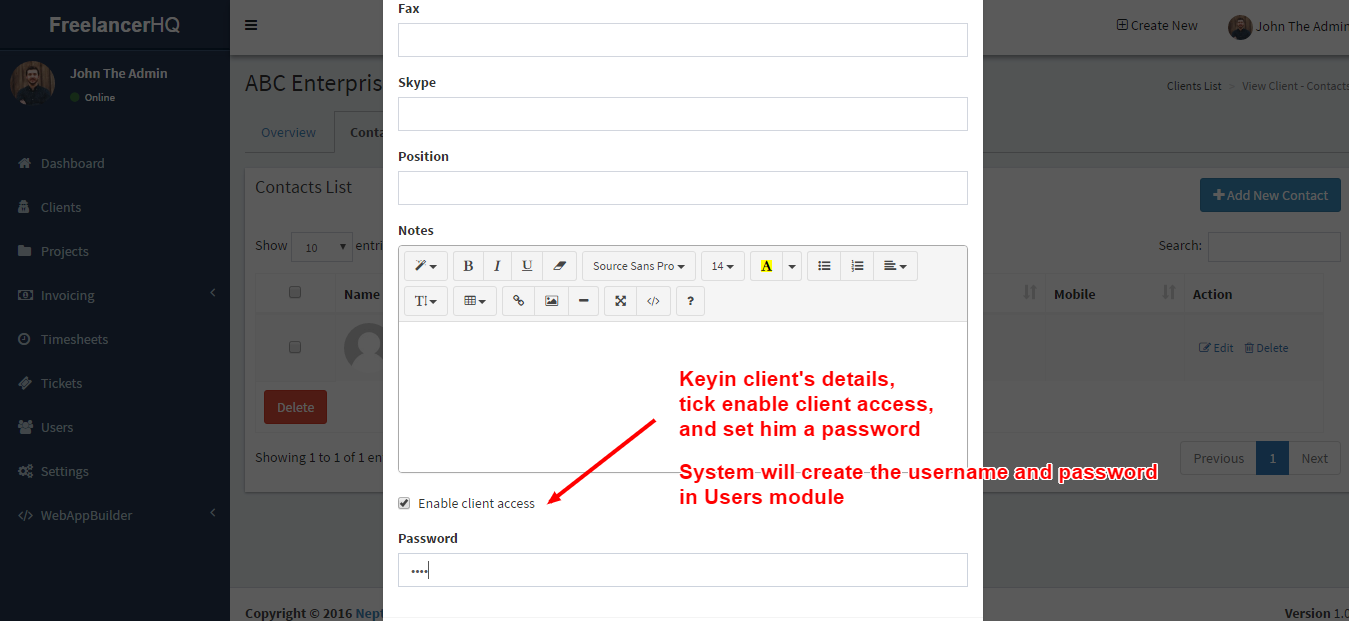
Clients Access
This is how you can give access to your client:


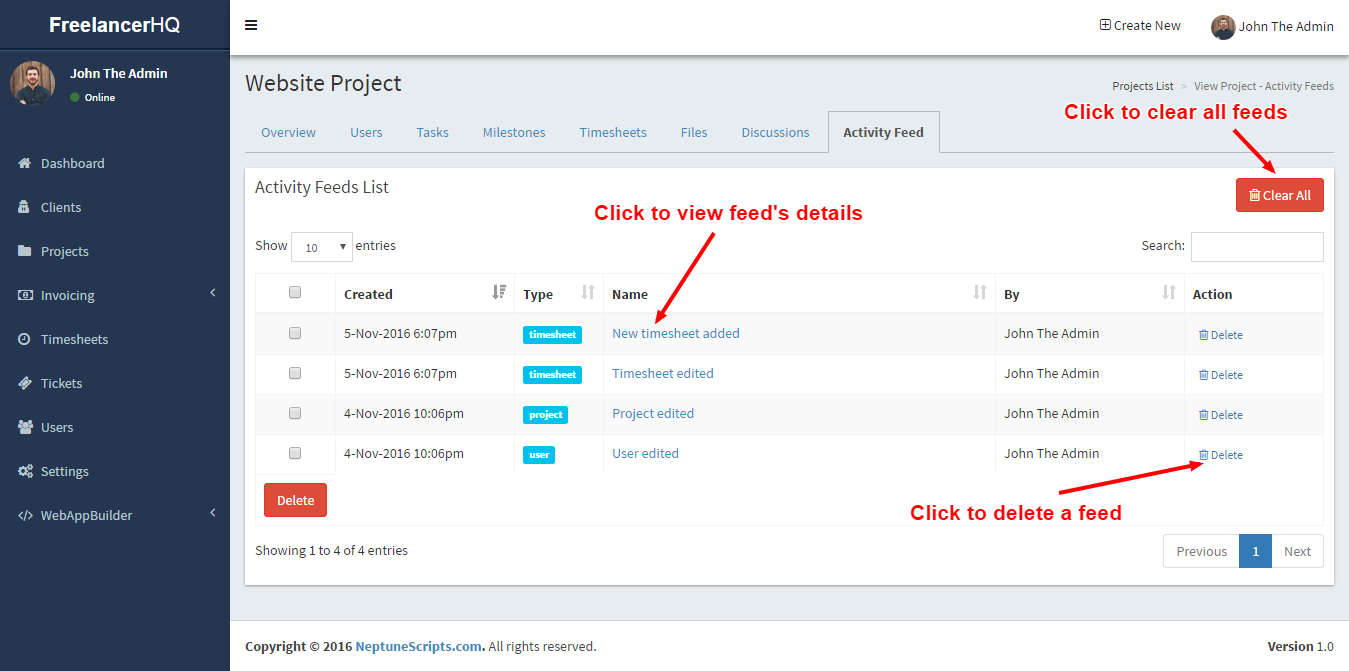
Projects Management
This is where you can manage your projects.
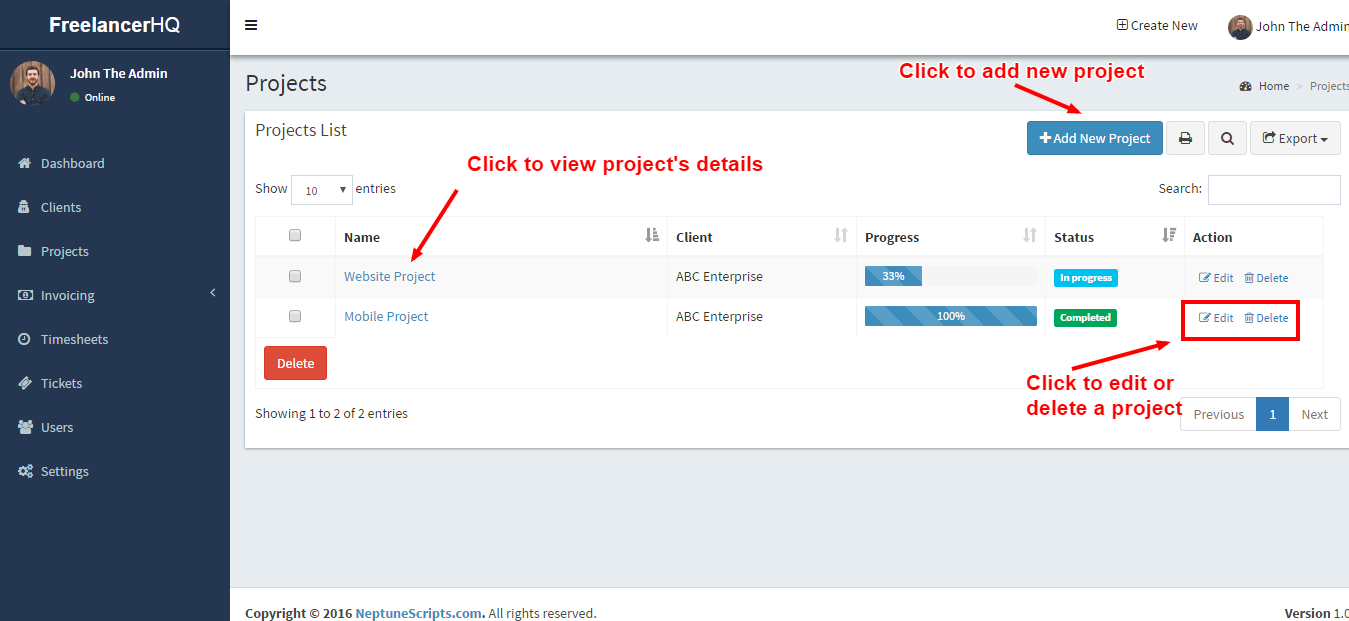
View project's details
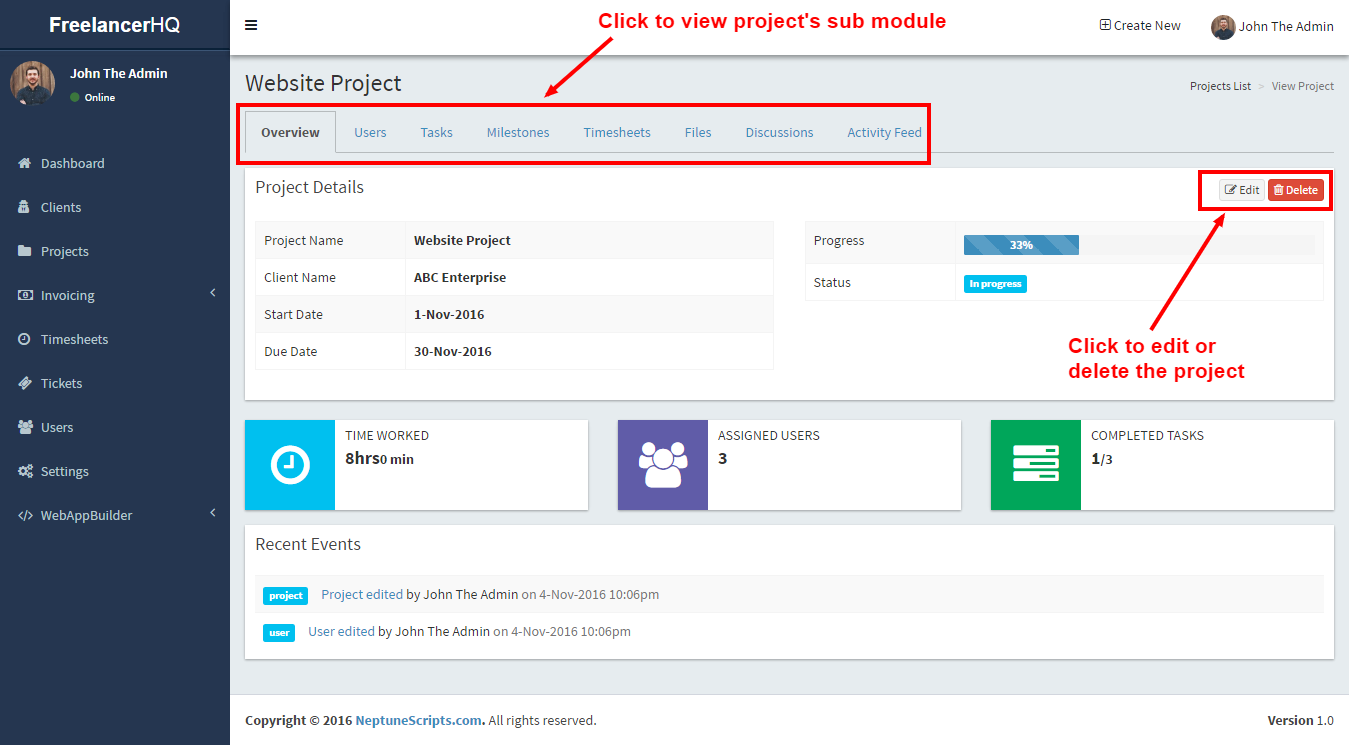
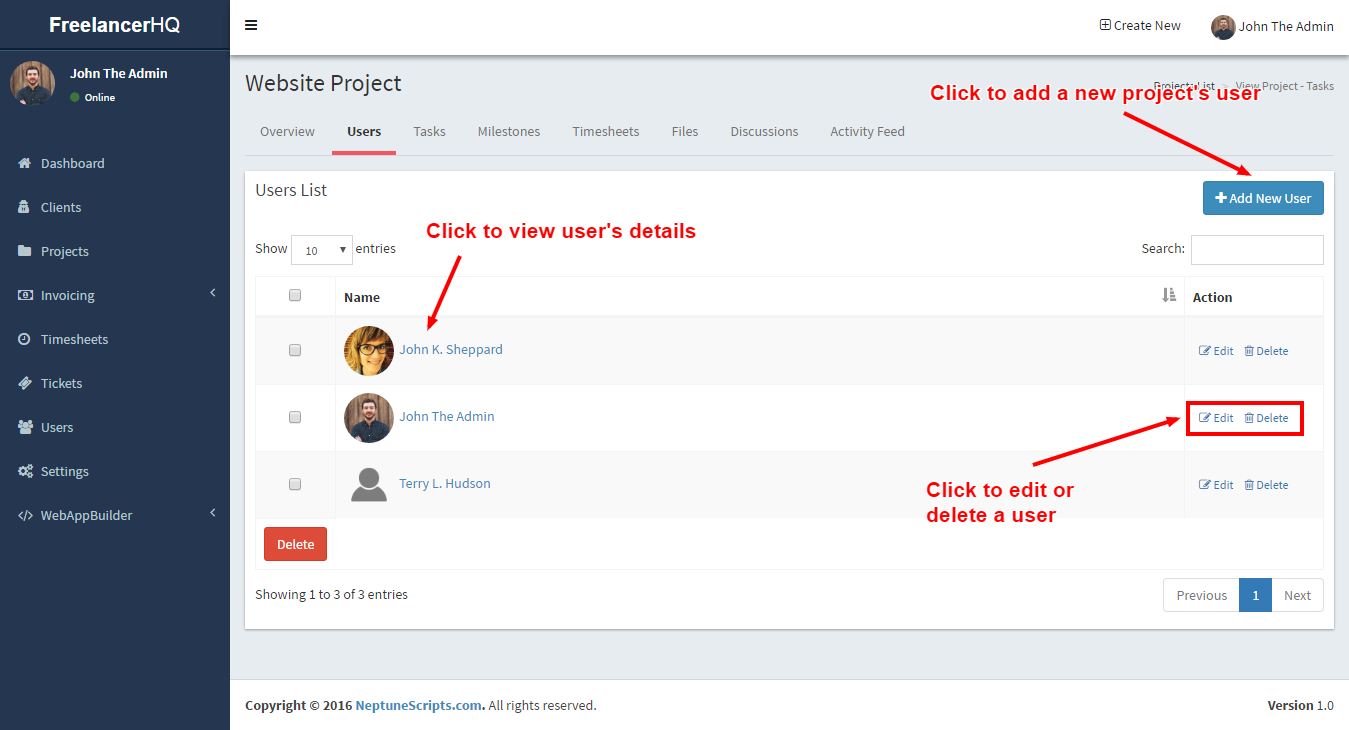
View project's users
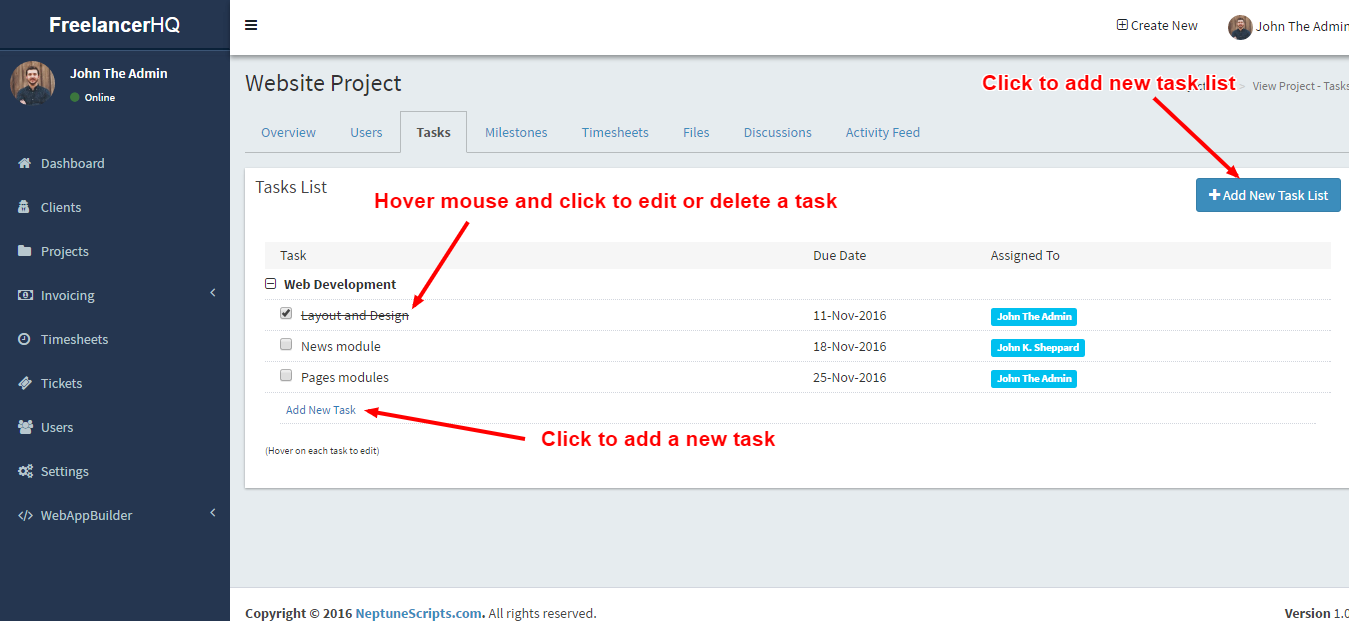
View project's tasks
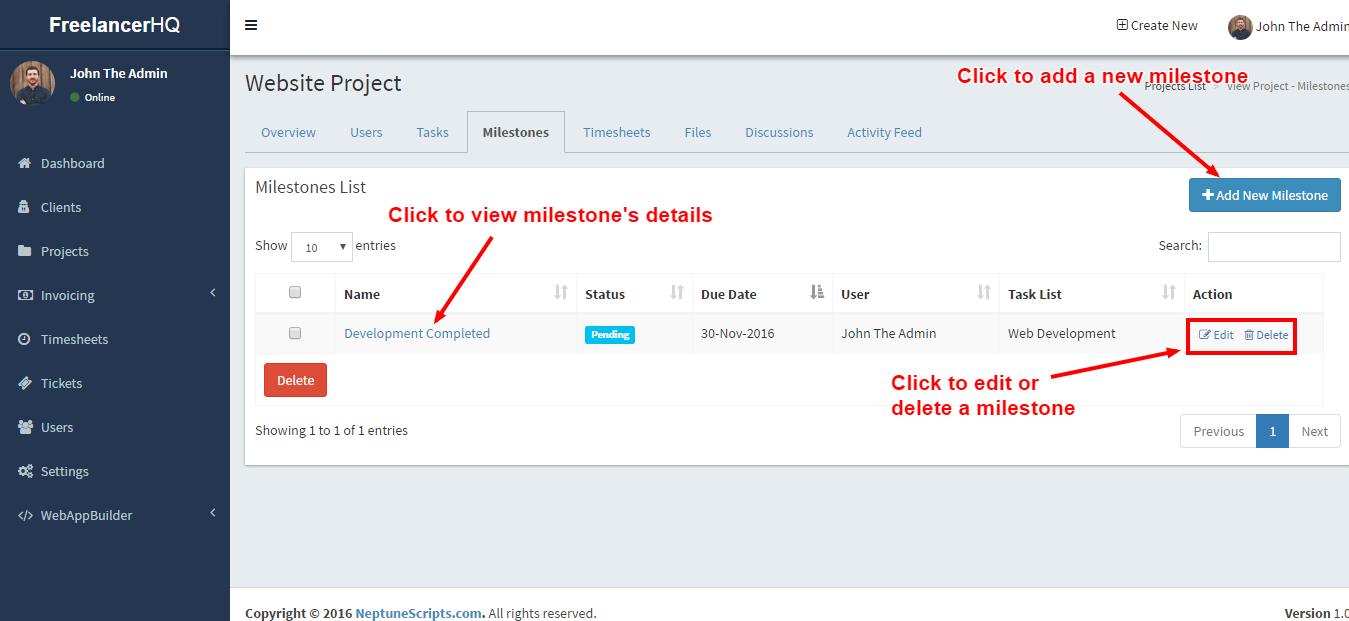
View project's milestones
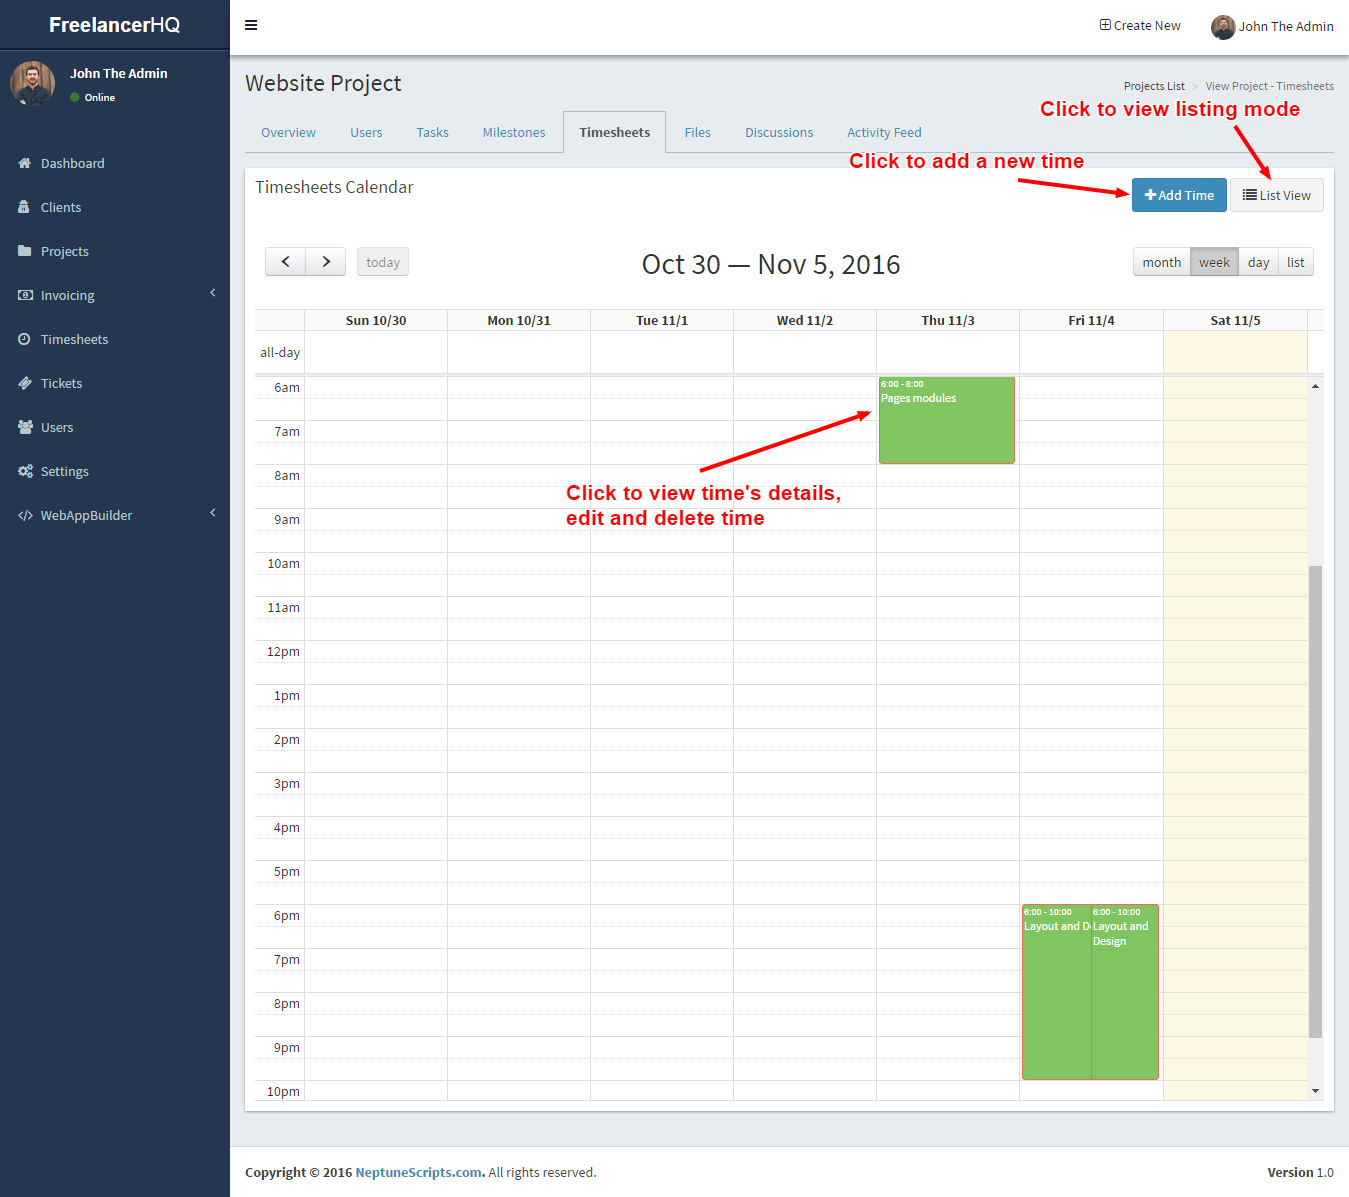
View project's timesheets
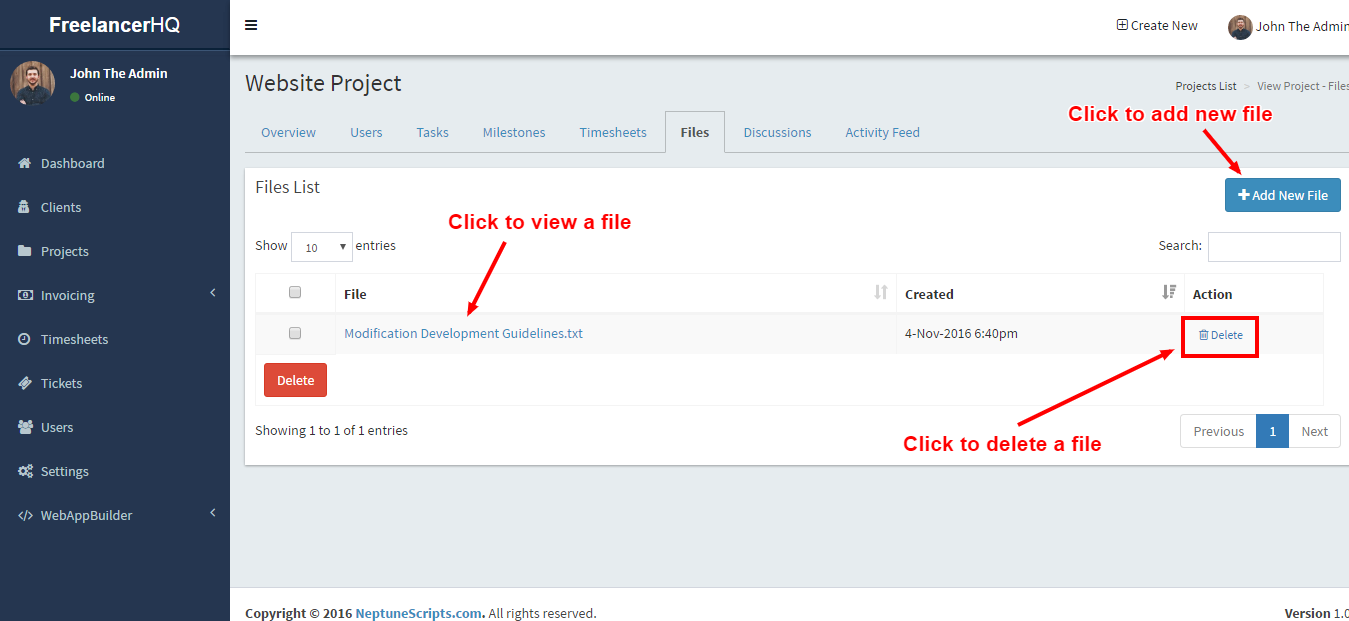
View project's files
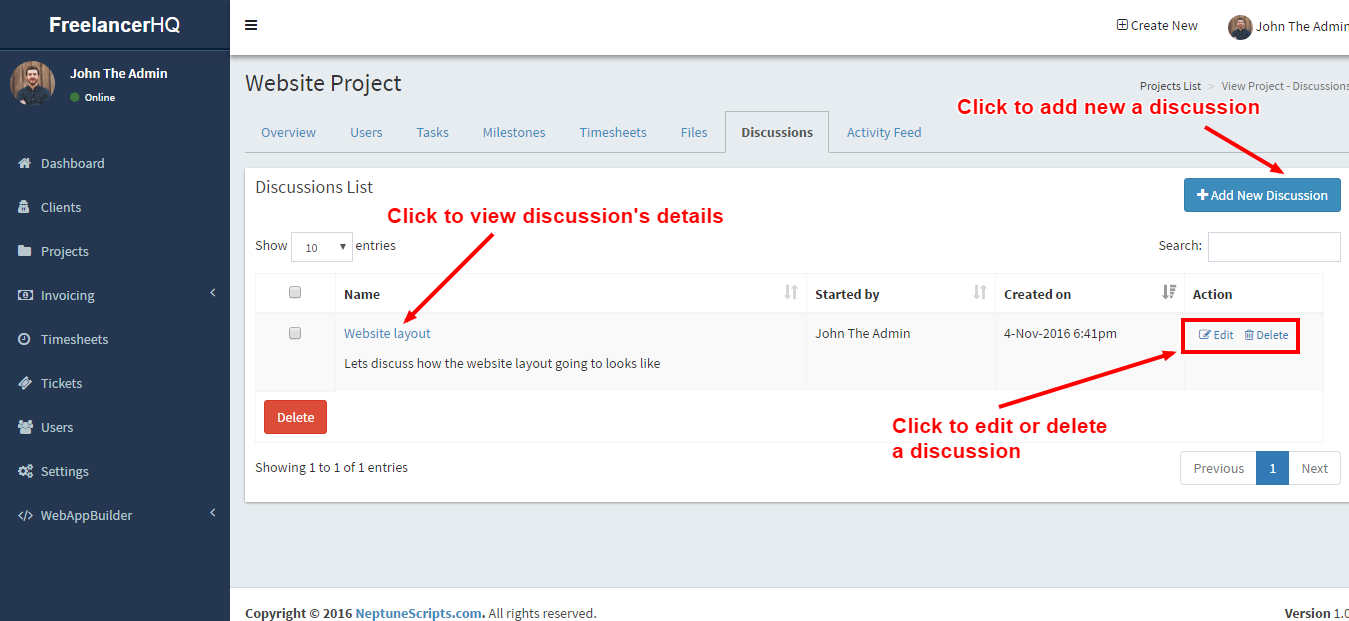
View project's discussions
View project's activities feed
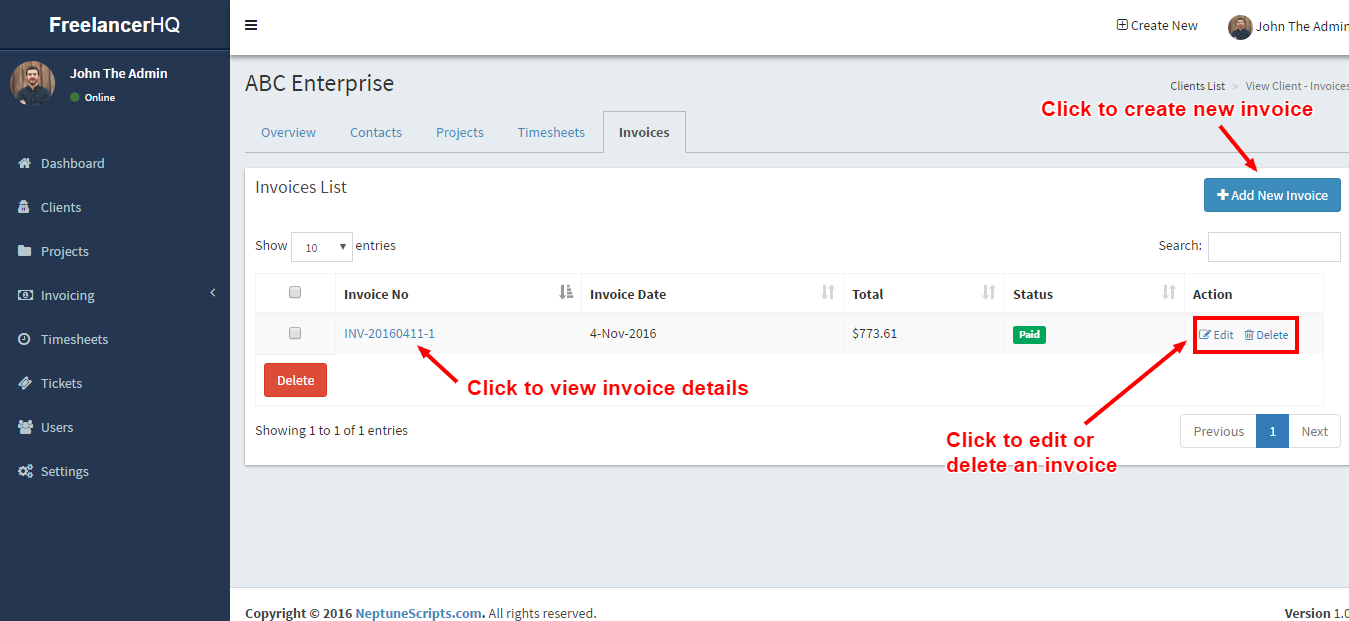
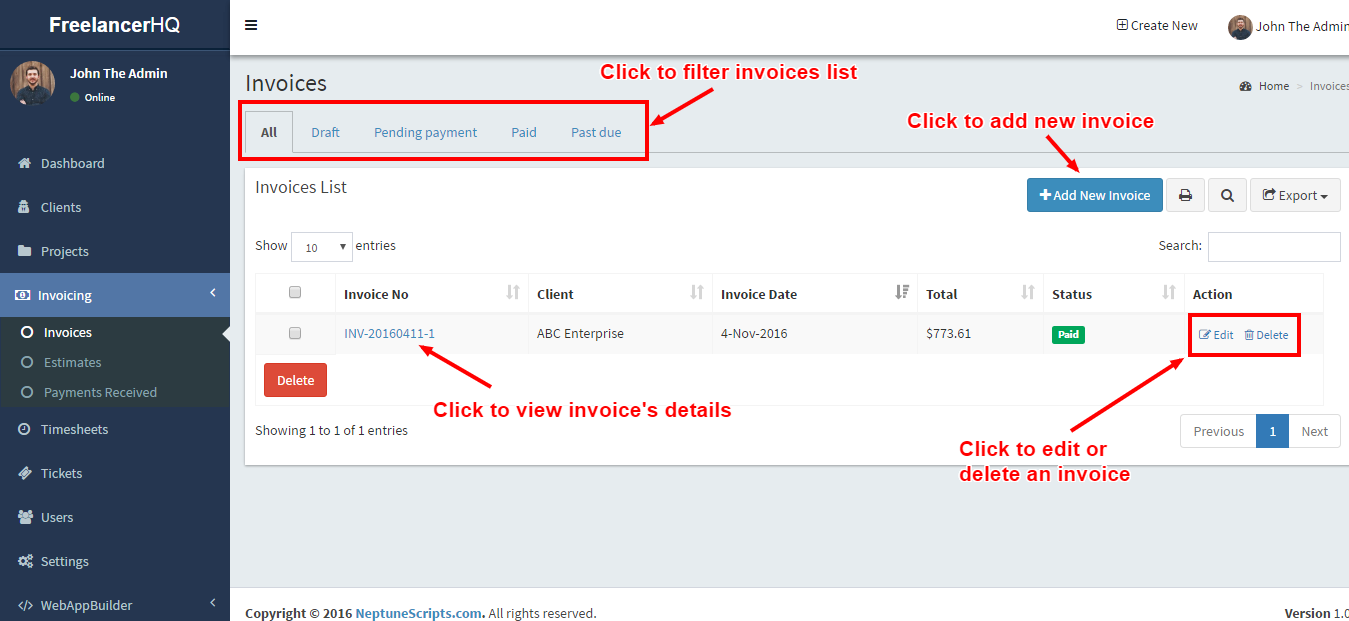
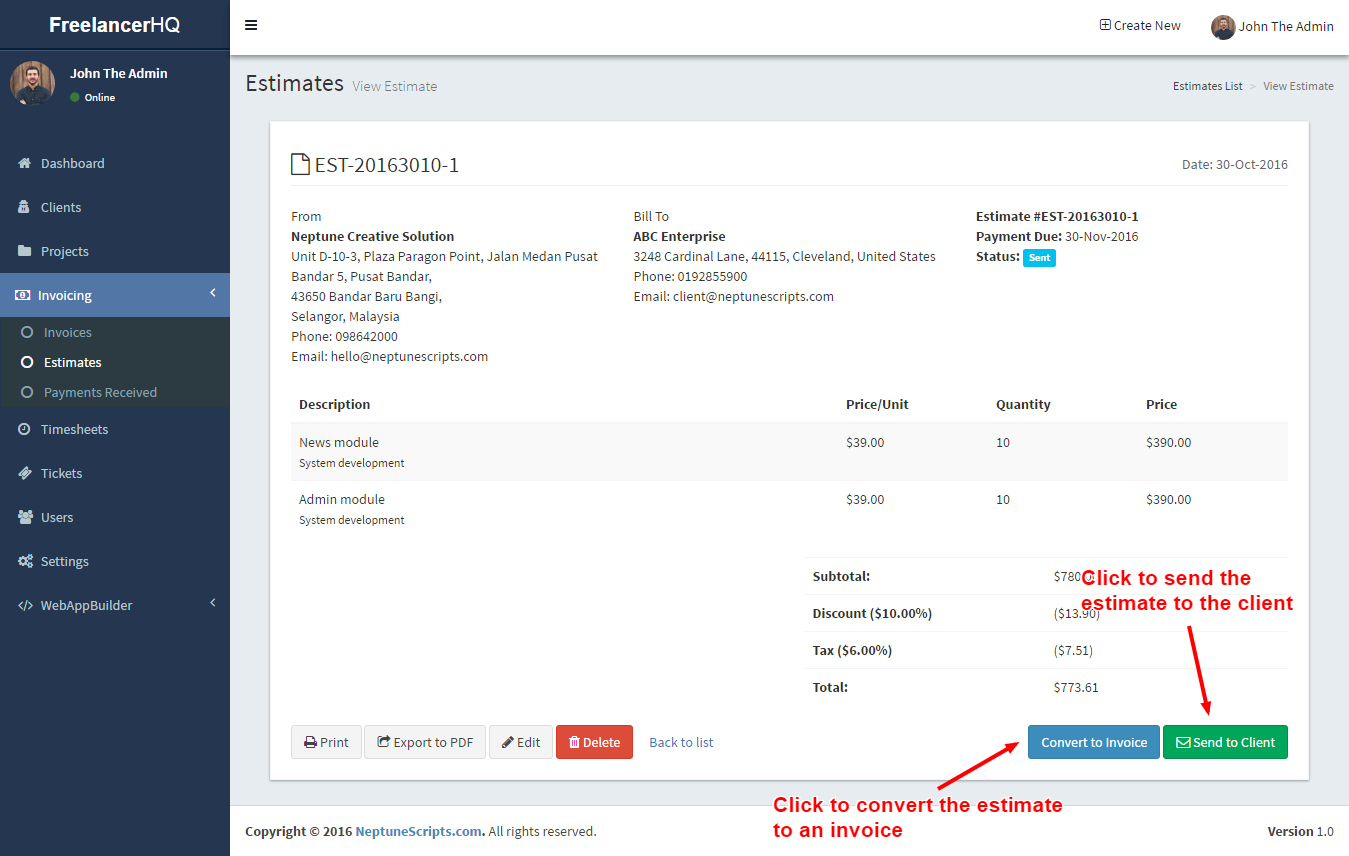
Invoices Management
This is where you can manage your invoices, estimates and payments.
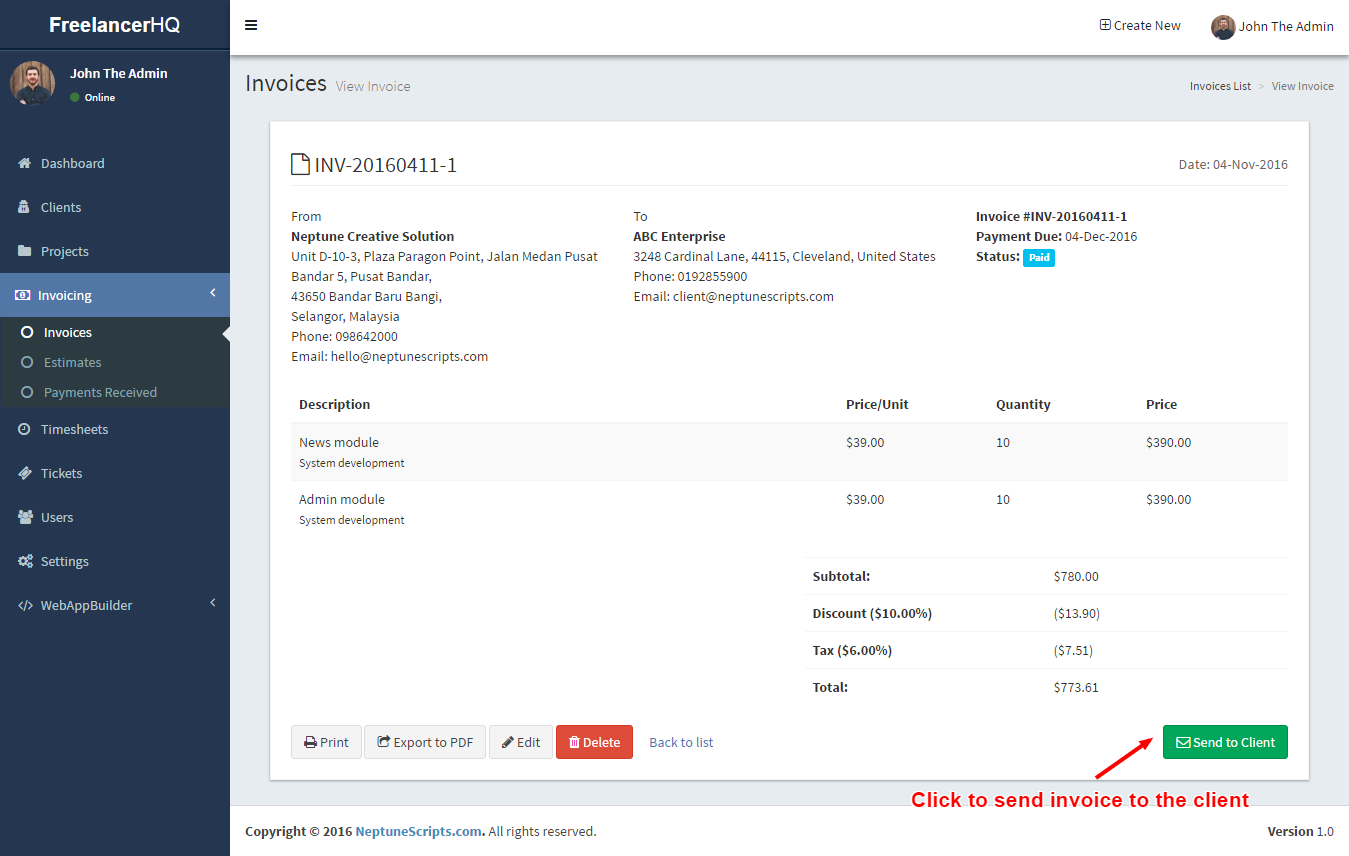
Manage invoices
Send invoice to client
Manage estimates
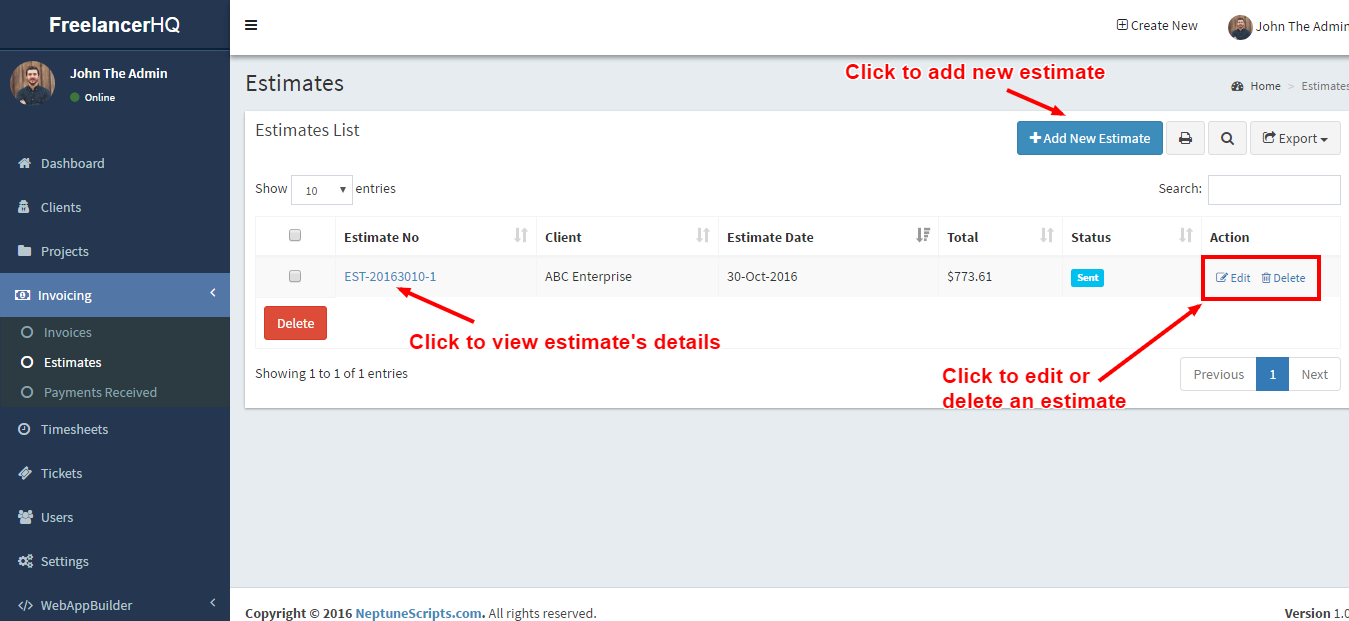
Send estimate to client, Convert to Invoice
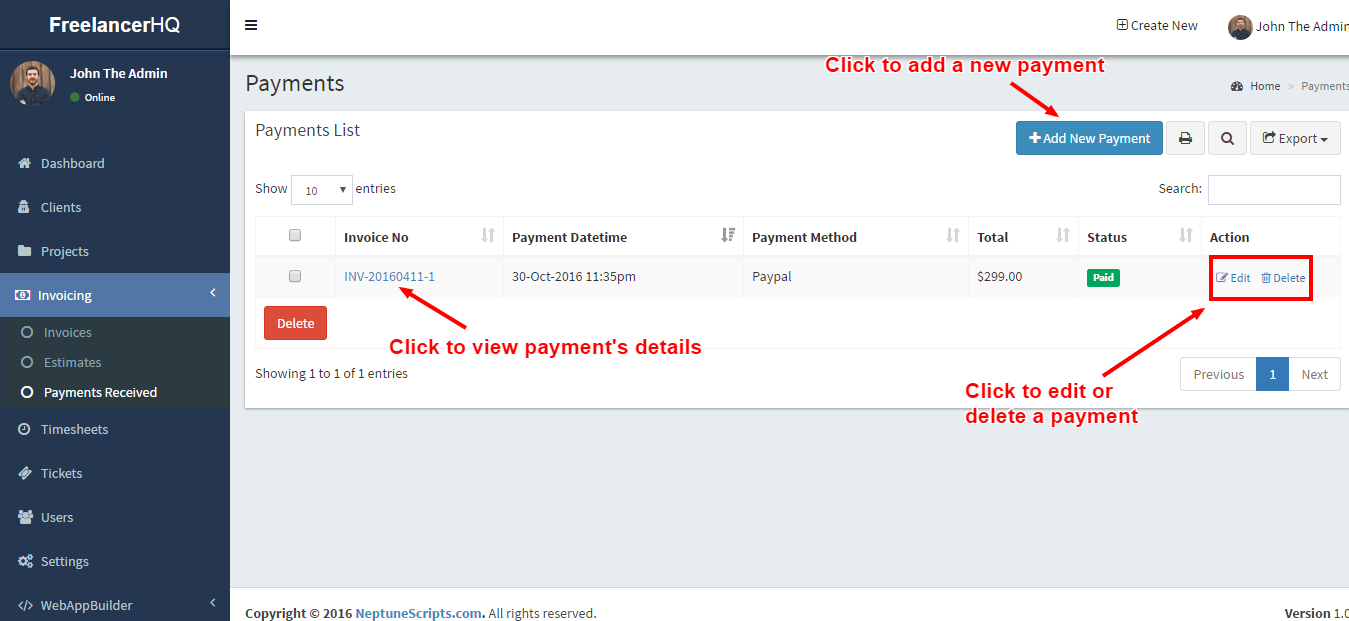
Manage payments
Every successful paid invoice's payment will be listed here.
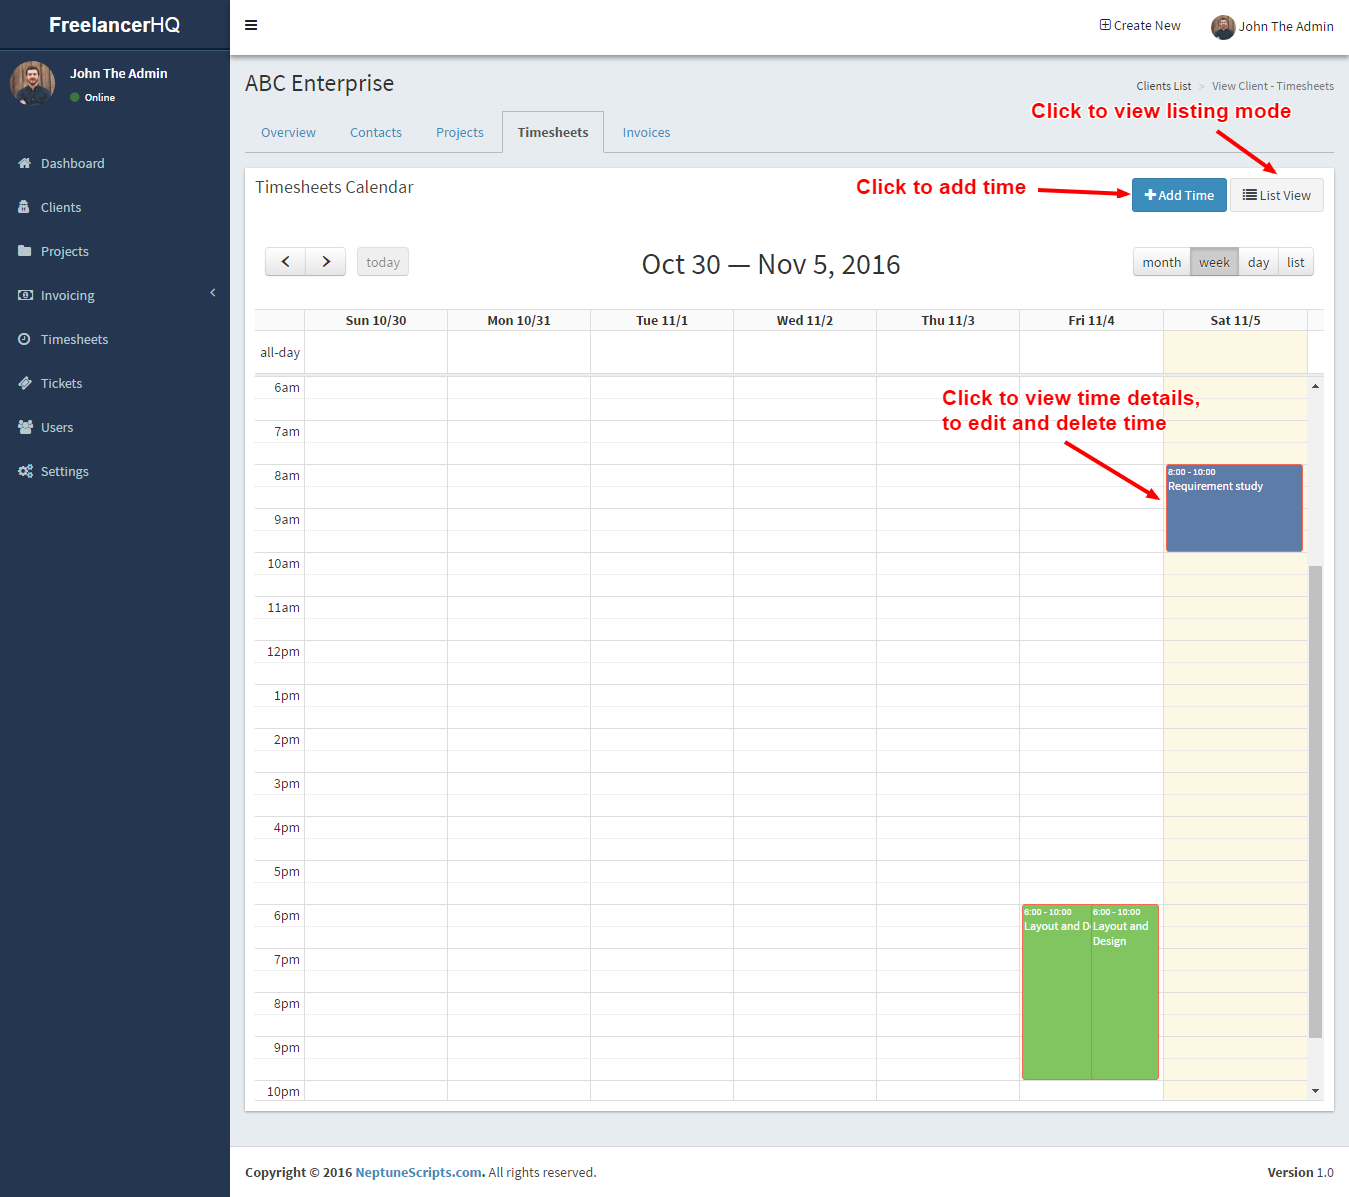
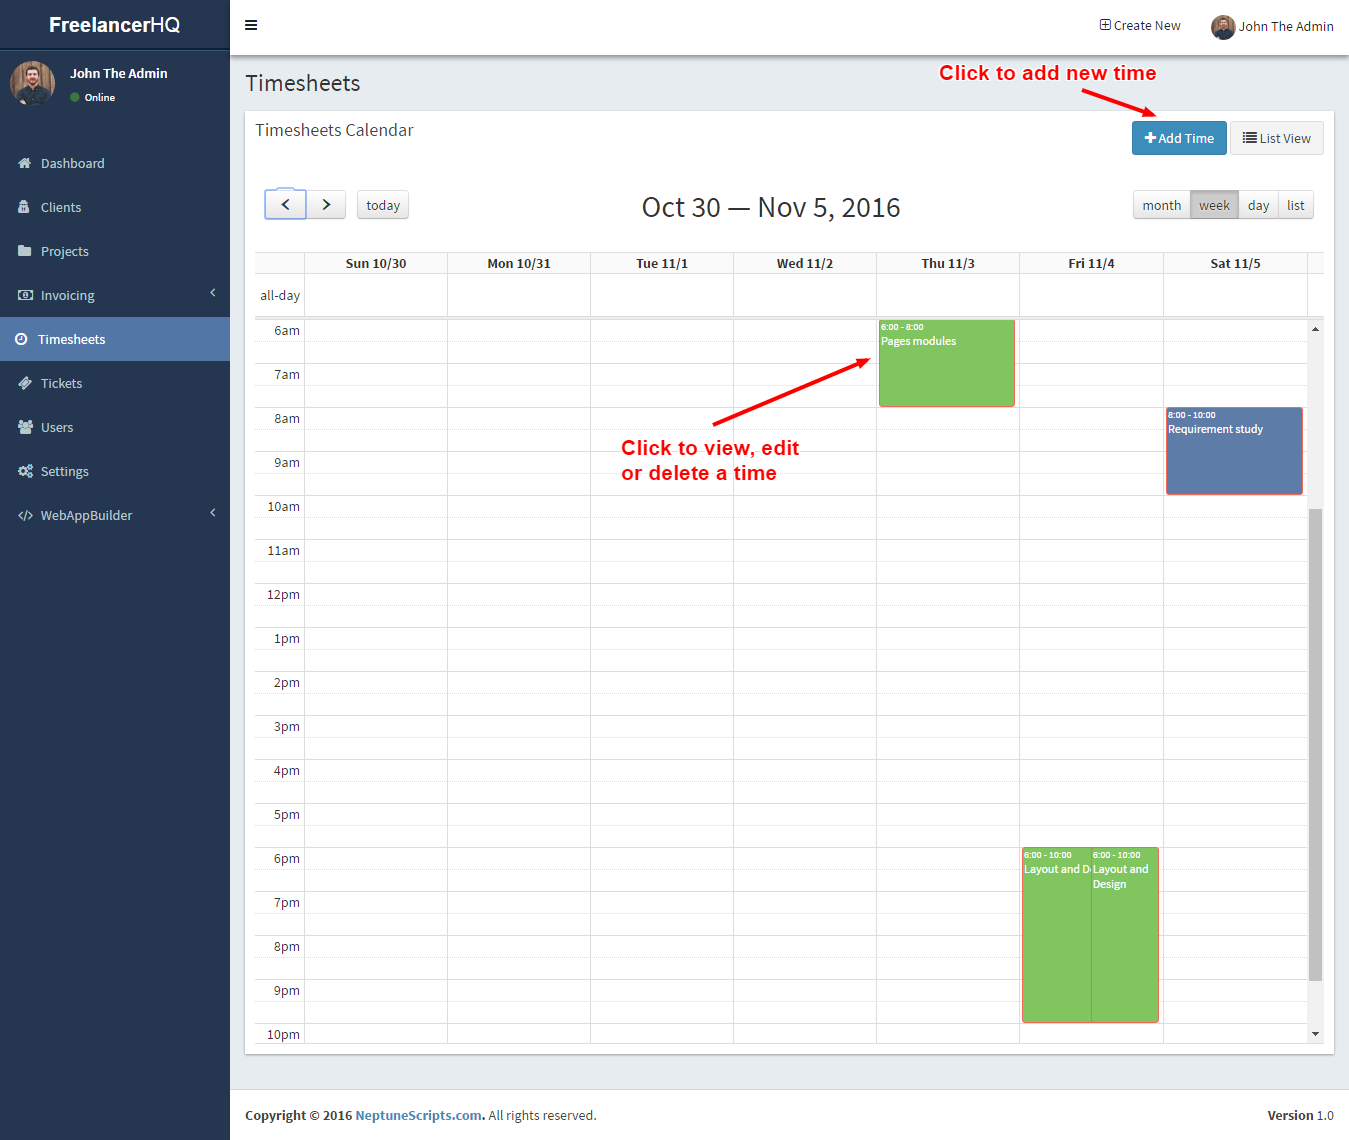
Timesheets Management
This is where you can manage your team's time logs.
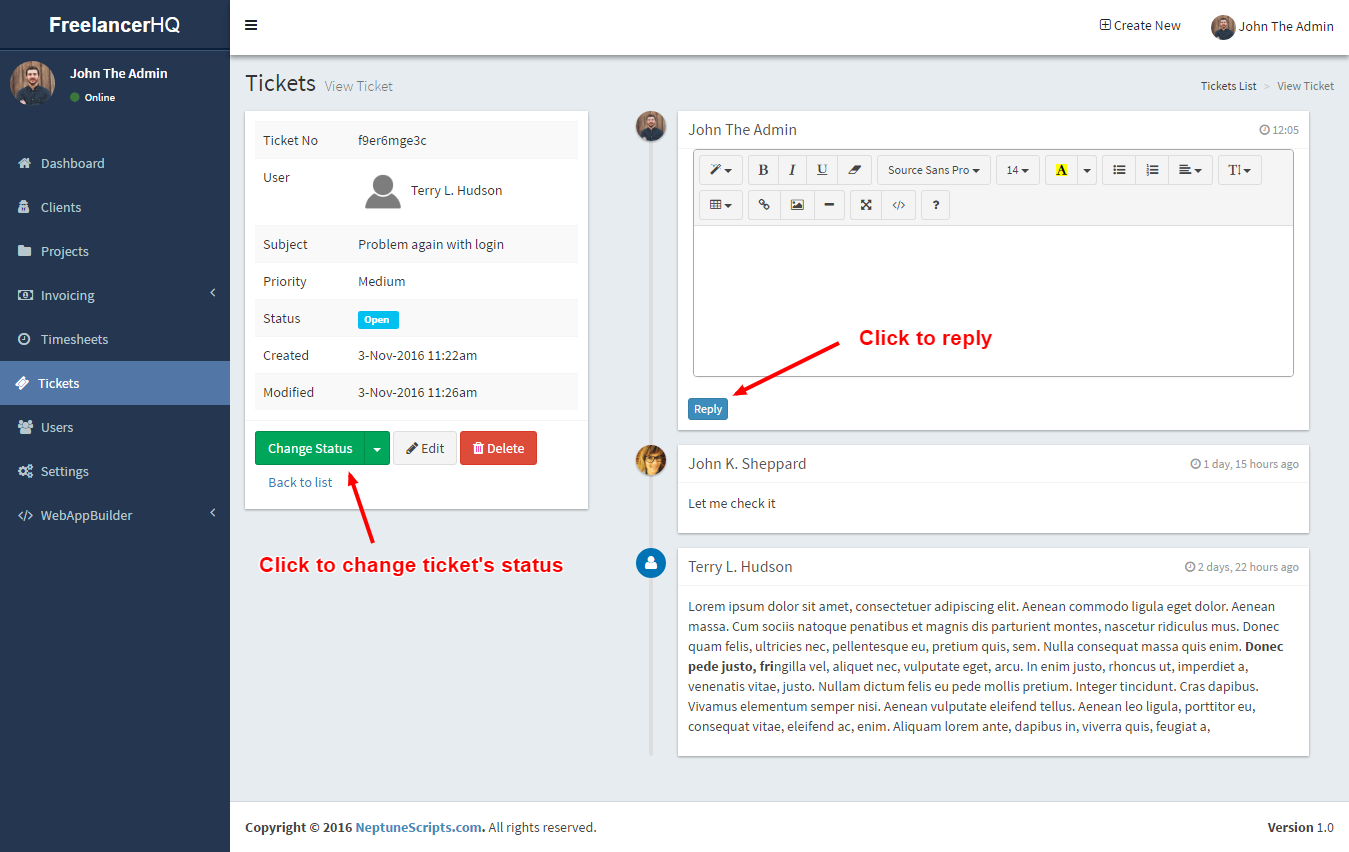
Tickets Management
This is where you can manage your client's tickets.
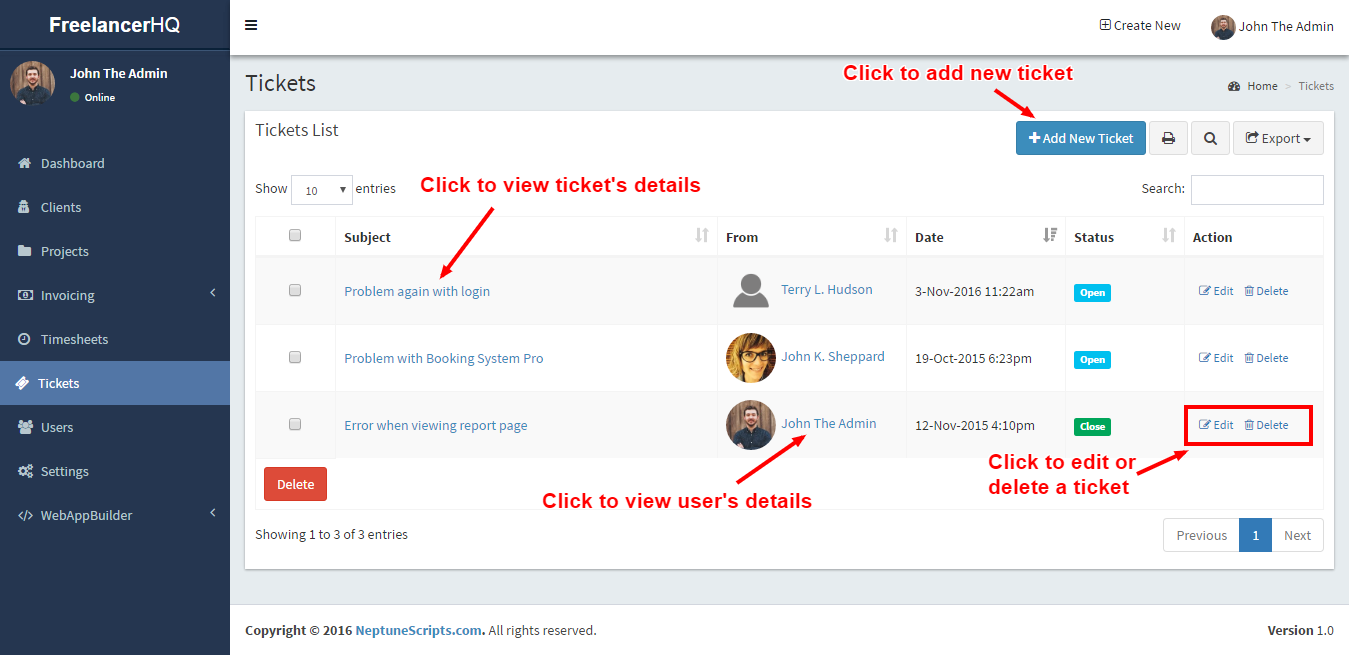
View ticket's details
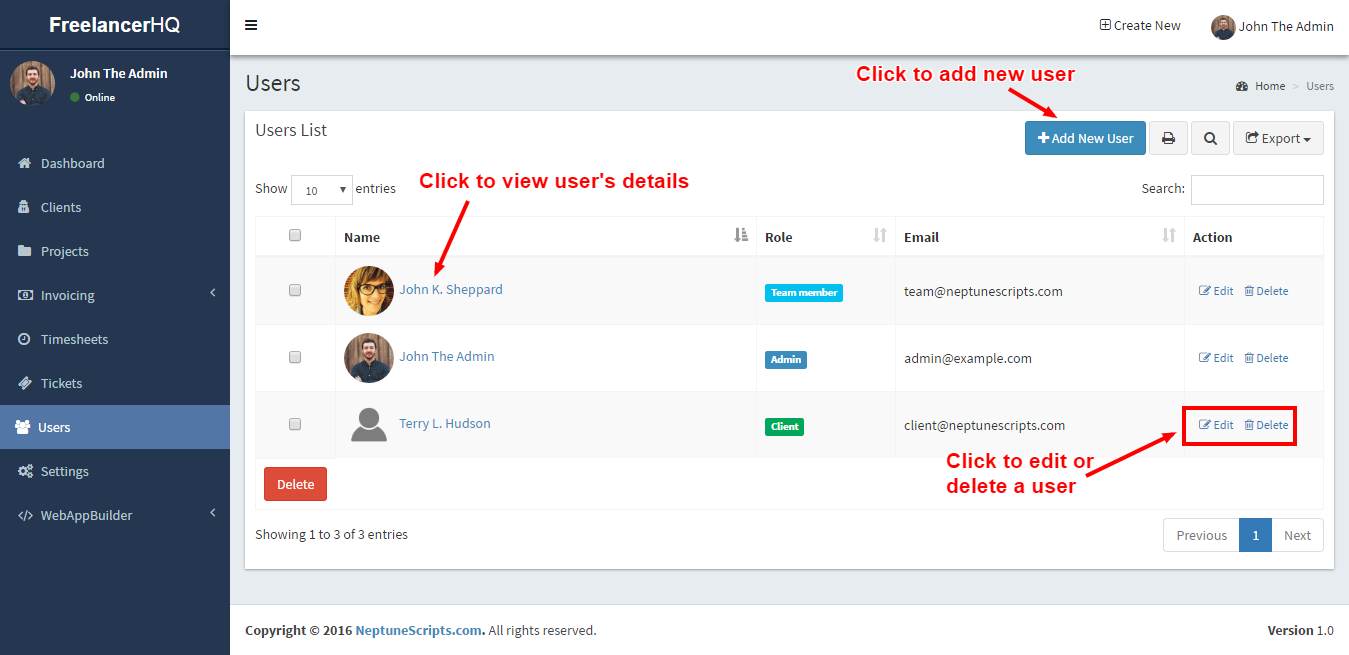
Users Management
Admin have full control to manage users.
Mail Configuration
By default we used builtin PHP mail function to send an emails. However, you might want to use other email settings such as SMTP.
How to edit email setting in FreelancerHQ?
Edit file /app/Config/email.phpTo use SMTP email, change the config settings as per below:
	public $default = array(

                            'transport' => 'Smtp',

                            'from' => 'your email',

                            'host' => 'your smtp host',

                            'port' => 26,

                            'timeout' => 30,

                            'username' => 'your email',

                            'password' => 'your password',

                            'client' => null

                            );
You can use Gmail SMTP service too. Change the settings like this:
	public $default = array(

                            'transport' => 'Smtp',

                            'from' => 'your gmail email',

                            'host' => 'smtp.gmail.com',

                            'port' => 587,

                            'timeout' => 30,

                            'username' => 'your gmail email',

                            'password' => 'your gmail password',

                            'client' => null

                            );
If you have problem with gmail email setup, try to get Google app password and use that password as your gmail password in the email settings:
https://security.google.com/settings/security/apppasswords
How to change default email in FreelancerHQ?
To change default email, edit file /app/Config/config.php
Change "from_email" and "contact_mail" to your email. System will use this email as sender email.
How to Upgrade
- Backup your database, you can use PhpMyAdmin to export your database into sql file.
-
Update your database
- Execute all sql files in folder /sql -
Update your web files
- Replace these files/folder with the new one:
--- /app/Config/sql/app.sql
--- /app/Config/bootstrap.php
--- /app/Controller/*.*
--- /app/Model/*.*
--- /app/Plugin/*.*
--- /app/Vendor/*.*
--- /app/View/*.*
--- /app/webroot/*.*
-
Clear cache files
- Delete all files in the following folder:
--- /app/tmp/cache/models/*.*
--- /app/tmp/cache/persistent/*.*
--- /app/tmp/cache/views/*.*
That's it. Enjoy!
Frequently Asked Questions (FAQ)
Can FreelancerHQ run on My Server?
If you have all requirements on your server then yes you can run it!. Please check requirements Installation section
Which Provider Do you recommend for FreelancerHQ?
FreelancerHQ will work on any server if it matched with our requirement. However we suggest www.hostgator.com, www.bluehost.com or www.godaddy.com hosting for FreelancerHQ script. We have many successful installation on one of those.
Can I use this in more than one domain?
First of all, please check Envato Help Page for it. http://codecanyon.net/licenses/standard With purchase license you have one domain permission. You need to get another licenses for your another domians if you want to use on more than one domain. Its same rule for any Codecanyon item.
How Can I change my files and theme!
Our theme files in app/View, assets in app/webroot folder. You can edit them.
I need fresh install with my old data
Please install FreelancerHQ with fresh files and new database. Then please move your old app/webroot/files folder to new app/webroot/files directory. and move your old database tables to new one
If you have other issues, you might find solution to your problem here.
License
Regular License
Use, by you or one client, in a single end product which end users are not charged for. The total price includes the item price and a buyer fee.Extended License
Use, by you or one client, in a single end product which end users can be charged for. The total price includes the item price and a buyer fee.Buy Now!
Changelog
v1.0 - 6/11/16
- First public release- Clients management
- Projects management
- Invoices management
- Timesheets management
- Tickets management
- Users management